
A pest control inspection checklist is the walk-through a technician follows at a property before deciding what to treat: the exterior, each room inside, the attic, crawl space or basement, the garage, and the conditions that invite pests in. Work it in the same order every time, record what you find with a photo, and the treatment decision almost makes itself. The full checklist is below, ready to copy.
This post is about inspecting the property. If you came here because a state inspector is coming to look at your records, you want the pest control record audit instead. And if you are after the one-page summary you leave with the customer afterwards, that is the service report template. The inspection checklist is what feeds both.
Why use a written inspection checklist?
Habit skips things on a hot afternoon, and a new hire has no habit yet. A written checklist does three jobs:
- It makes every inspection the same. The fourth stop gets the same look as the first.
- It produces evidence. A finding written down at the property, with a photo, is what you point to when a customer calls back. The guide to pest control callbacks explains why the first visit's notes decide most callback arguments.
- It trains people. A checklist is the fastest way to teach a new technician what "a good inspection" means at your company.
How do you run a pest control inspection, step by step?
Follow the same order at every property. Outside to inside, bottom to top, wet areas first.
- Talk to the customer for two minutes. What have they seen, where and how often? Ask about pets, children, allergies and anything they already sprayed.
- Walk the exterior perimeter. Foundation line first, then eye level: entry points, moisture, vegetation, debris.
- Check the yard and outbuildings. Sheds, fences, woodpiles, irrigation, trash and recycling areas.
- Go inside, starting with the kitchen and bathrooms. Moisture and food are where most indoor activity starts.
- Work through every other room. Bedrooms, living areas, laundry, utility rooms, closets. Note rooms you could not enter.
- Inspect the garage. It is where outside pests become inside pests.
- Check the attic and the crawl space or basement.
- Log conducive conditions. Anything the customer can fix that would make your treatment last longer.
- Decide. Compare what you found to your company's action threshold for that pest. One ant on a patio is not the same as a trail into the pantry.
- Record and photograph. Before you start treating, not after.
The decision step is where an inspection earns its keep. The EPA describes integrated pest management as setting action thresholds, monitoring and identifying pests, prevention, and then control, with the less risky controls chosen first and broadcast spraying of non-specific pesticides as a last resort (EPA, IPM principles). Your inspection is the "monitor and identify" step, done properly.
The full pest control inspection checklist
Copy this into a document, print it, or paste it into your notes app. Tick each line, write the location next to anything you find, and photograph every line marked (photo).
PEST CONTROL INSPECTION CHECKLIST

Date: ________  Technician: __________________  Time in: ______  Time out: ______
Property address: ____________________________________________
Property type: ☐ House  ☐ Apartment/condo  ☐ Commercial: ____________
Reason for visit: ☐ New customer  ☐ Routine service  ☐ Callback  ☐ Other
Customer's concern (their words): ______________________________
Pets / children / allergies / sensitive occupants: ______________

1. EXTERIOR PERIMETER
☐ Foundation: cracks, gaps, weep holes, expansion joints (photo)
☐ Doors: sweeps, thresholds, gaps under garage door (photo)
☐ Windows: screens, sills, gaps around frames
☐ Utility penetrations: pipes, cables, AC lines, dryer vent
☐ Roofline: eaves, soffits, fascia, gaps at roof returns
☐ Vents: foundation vents, gable vents, screens intact
☐ Mulch or soil against foundation (inches of clearance: ____) .. (photo)
☐ Plants or tree limbs touching the structure
☐ Gutters and downspouts draining away from the foundation
☐ Standing water, leaking hose bibs, irrigation hitting the wall
☐ Wood-to-soil contact (siding, trim, decks, steps) (photo)
☐ Mud tubes on foundation or piers (photo)
☐ Ant trails or mounds, nests, webs, wasp activity
☐ Rodent burrows, rub marks, droppings along the wall (photo)

2. YARD AND OUTBUILDINGS
☐ Woodpiles, lumber, debris (distance from house: ____)
☐ Sheds, fences, play structures
☐ Trash and recycling: lids closed, location
☐ Pet food or bird feeders outside
☐ Low spots that hold water

3. KITCHEN
☐ Under sink: leaks, gaps around pipes (photo)
☐ Behind and under appliances (fridge, stove, dishwasher)
☐ Cabinets and pantry: droppings, frass, stored product pests
☐ Food storage: open packages, crumbs, pet food
☐ Cracks and crevices along counters and backsplash

4. BATHROOMS
☐ Under sinks and around toilets: moisture, gaps
☐ Tub and shower surrounds, plumbing access panels
☐ Floor drains, exhaust fans

5. BEDROOMS AND LIVING AREAS
☐ Baseboards, outlet covers, window sills
☐ Beds and furniture seams (if bed bugs are a concern) (photo)
☐ Closets and storage, clutter level
☐ Rooms not entered: _________________________________

6. LAUNDRY AND UTILITY
☐ Water heater, washer hookups, HVAC unit: leaks and gaps
☐ Floor drains and sump

7. GARAGE
☐ Door seal and side gaps
☐ Stored boxes, cardboard, firewood, pet food
☐ Wall to slab joint, expansion joints

8. ATTIC
☐ Insulation: tunnels, nesting, droppings (photo)
☐ Rafters and framing: gnaw marks, damage
☐ Vents and gable screens from inside
☐ Roof leaks or staining
☐ Access: ☐ Full  ☐ Partial  ☐ None (why: __________)

9. CRAWL SPACE OR BASEMENT
☐ Moisture: standing water, damp soil, condensation (photo)
☐ Wood: damage, soft spots, mud tubes on piers (photo)
☐ Vapor barrier condition
☐ Gaps at sill plate and penetrations
☐ Access: ☐ Full  ☐ Partial  ☐ None (why: __________)

10. MONITORS AND STATIONS
☐ Monitors or bait stations checked: number ____ with activity ____
☐ Stations damaged, missing or moved

11. CONDUCIVE CONDITIONS FOR THE CUSTOMER
1. ________________________________  Who fixes it: ☐ Customer  ☐ Us
2. ________________________________  Who fixes it: ☐ Customer  ☐ Us
3. ________________________________  Who fixes it: ☐ Customer  ☐ Us

12. FINDINGS SUMMARY
Pest identified: __________  Where: __________  Level: ☐ Low ☐ Moderate ☐ High
Pest identified: __________  Where: __________  Level: ☐ Low ☐ Moderate ☐ High
Above our action threshold?  ☐ Yes  ☐ No
Recommended action: ☐ Treat today  ☐ Exclusion work  ☐ Quote needed  ☐ Monitor only
Photos taken: ____
What evidence should you look for, pest by pest?
The checklist tells you where to look. This table tells you what counts as a finding for the pests most residential routes see.
| Pest | Evidence to look for | Where it usually shows up |
|---|---|---|
| Ants | Trails, workers carrying food, frass, nest openings | Kitchen sills, slab cracks, mulch beds, along the foundation |
| Cockroaches | Live insects, droppings like pepper or smears, egg cases, shed skins | Under sinks, behind appliances, cabinet hinges, drains |
| Rodents | Droppings, gnaw marks, rub marks, nesting material, tracks | Attic insulation, garage, behind appliances, along walls |
| Termites | Mud tubes, damaged or hollow-sounding wood, discarded wings | Foundation, crawl space piers, wood touching soil, door frames |
| Spiders | Webs, egg sacs, the insects they feed on | Eaves, corners, garages, basements, window wells |
| Bed bugs | Live bugs, shed skins, small dark spots, eggs | Mattress seams, bed frames, headboards, furniture joints |
| Stinging insects | Nests, flight paths, activity at gaps | Eaves, soffits, sheds, play structures, ground holes |
| Stored product pests | Larvae, webbing, adults in or near food | Pantry shelves, open packages, pet food bins |
Write the location as precisely as you can. "Mud tube on the second pier from the north wall of the crawl space" is a finding someone else can find again. "Termite evidence, crawl" is not.
Termite and wood-destroying organism work often comes with its own report format, set by your state or by the lender on a real estate transaction. This checklist is not a substitute for that. Check what your state requires and confirm with your state agency before you use any general checklist for a WDO inspection.
What should you record and photograph?
These findings need a photo:
| Finding | What to write | Photo to take |
|---|---|---|
| Live activity or droppings | Pest, exact location, how much | Close-up with something for scale |
| Entry point | Size, location, what it leads to | Wide shot to show where, close-up to show the gap |
| Moisture problem | Source, location, how wet | The source, and any damage around it |
| Wood damage | Location, extent, what it touches | Close-up and a wide shot |
| Conducive condition | The condition and who should fix it | Before photo, so the next visit can take an after |
| Area not inspected | Why (locked, stored items, unsafe) | The blocked access |
Three habits make the record useful later:
- Photograph before treating. Afterwards the evidence is gone.
- Write "areas not inspected" every time. A locked garage noted today is your answer to a callback from that garage next month.
- Keep the customer's words separate from yours. "Customer reports ants" and "Ant trail at kitchen sill" are different facts.
If you treat, the products go on the chemical application record, which is a separate legal record in most states. Our chemical application record template covers the fields. What you apply has to match the label: the label is the law, and the EPA puts it in exactly those words (EPA, introduction to pesticide labels).
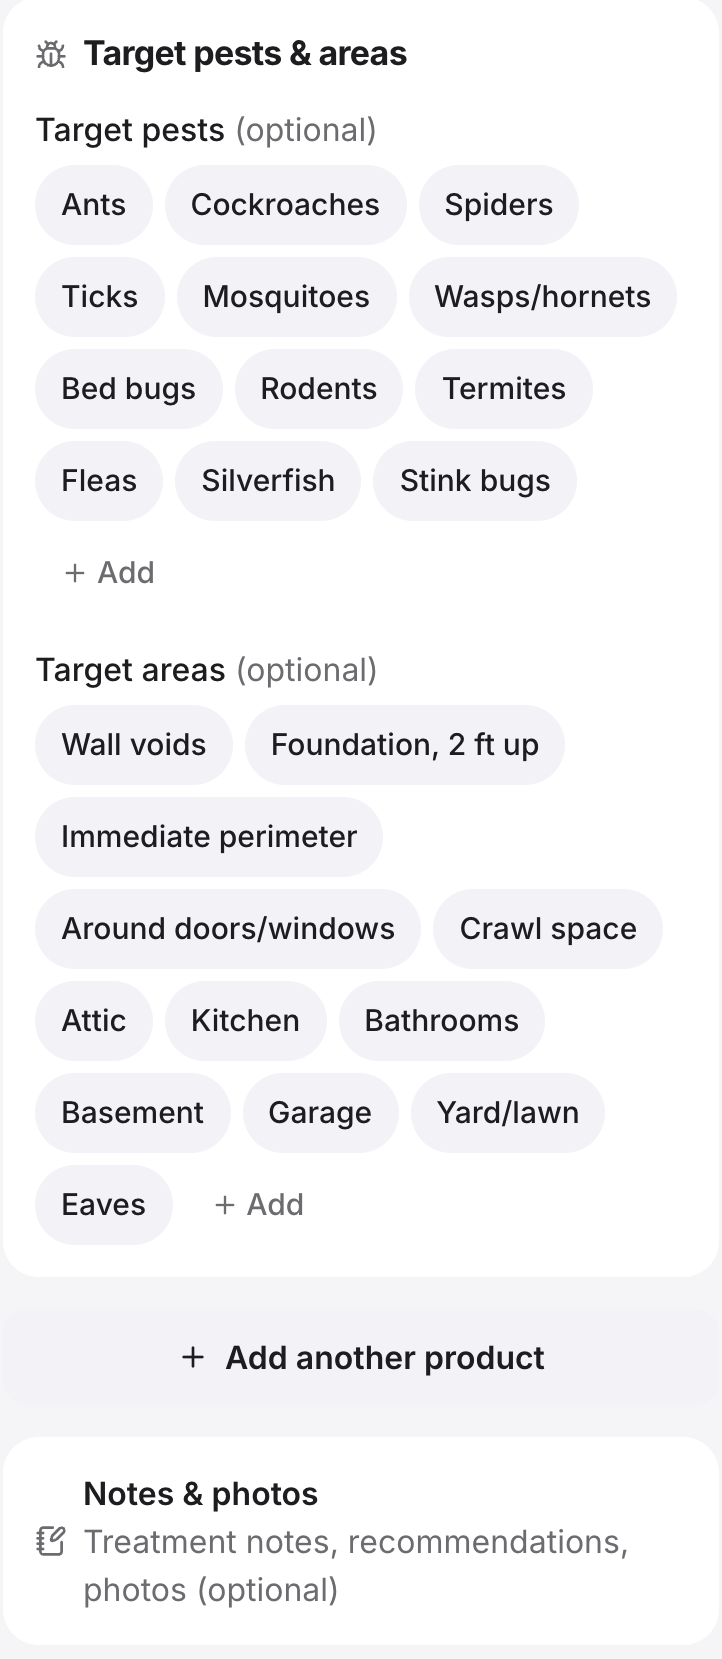 Target pests and areas, then notes and photos, as a technician completes a visit. (demo data)